7 Yoga Poses For Meditation
4. Siddhasana (Accomplished Pose)
Siddha means “accomplished” or “perfected,” and this pose is described in classical yoga texts as one of the most suitable for meditation. It’s a more compact version of the cross-legged seat, with the feet stacked close to the body, which helps keep the back upright and the legs grounded.
Many people find it extremely stable once they get used to it, because the heels and the base of the pelvis create a firm, triangular foundation. It takes a bit more hip flexibility than Sukhasana, so use plenty of support while you’re learning.
How to do it:
- Sit on a firm cushion with your legs stretched out in front of you.
- Bend your left knee and bring your left heel gently toward your pelvis, resting the sole against your right inner thigh.
- Bend your right knee and place your right foot in front of the left, with both heels roughly lined up near the center of your body.
- Lengthen your spine, relax your shoulders, and rest your hands on your knees.
Be careful if: You have tight hips, knee pain, or sciatica. Keep the cushion high and don’t force the knees down.
5. Baddha Konasana (Bound Angle Pose)
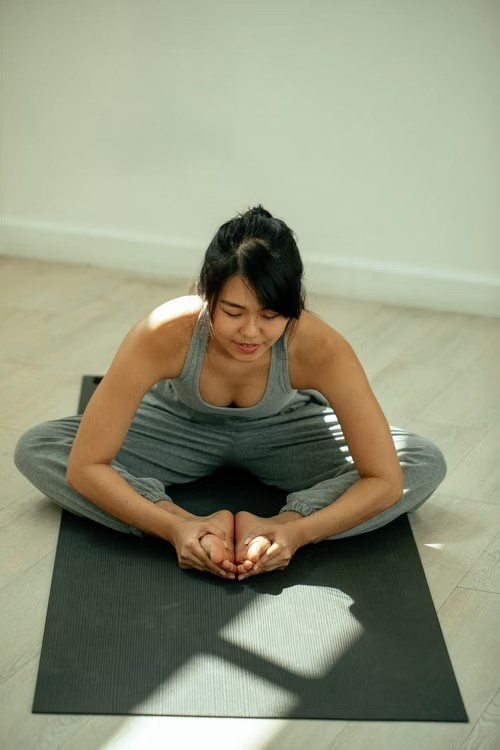
Here’s the surprise. If you struggle to sit comfortably, you probably blame your back. But for many people, the real culprit is tight hips and inner thighs. When those muscles are short, they pull your pelvis backward and force your lower back to round, no matter how hard you try to sit up straight.
Baddha Konasana (also called Butterfly Pose) opens exactly those areas. Holding it for a couple of minutes before you meditate can make every other seat on this list noticeably more comfortable. It also works as a meditation seat in its own right for people who enjoy a wider, more open position.
How to do it:
- Sit on a cushion with your legs stretched out in front of you.
- Bend both knees and bring the soles of your feet together, letting your knees fall out to the sides.
- Hold your feet or ankles, lengthen your spine, and let your knees relax. Don’t press them down.
- Stay for 1 to 3 minutes, breathing slowly. If your knees float high, place a folded blanket or cushion under each one.
Be careful if: You have groin or knee injuries. Move gently and stop if you feel pinching or sharp pain.

0 Comments