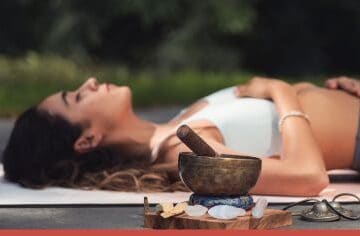
Yoga Poses for Stress relief
Easy Yoga Poses for stress relief:
Everyone in this fast life is going through mental stress today. This tension arises because of imbalance and dissonance between mind conditions and circumstance.
The person does not even know and he gets infected with this problem. This psychosis is more intense when the mind starts to complain about it.
Negative thinking leads to stress. We can control negative thinking but it is difficult to overcome much when it comes in the form of tension.
Note: Please start yoga in the supervision of a Yoga Instructor or Yoga Trainer, on a regular basis.
(Check-out these best yoga retreats in the world).
If you do yoga continuously and regularly, you can overcome the stress.
There are some exercises in yoga that helps you get relaxed.
Here I’m telling you some of the easiest and simplest yoga asanas or yoga poses to relieve stress.
And if you are searching for the best yoga mats for your practice check these.
Table of Contents
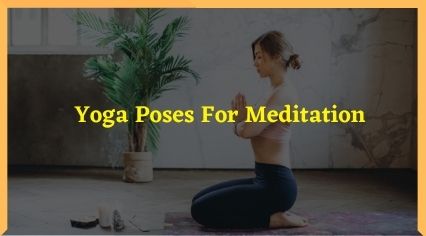
Yoga poses for stress relief
1. Tadasana
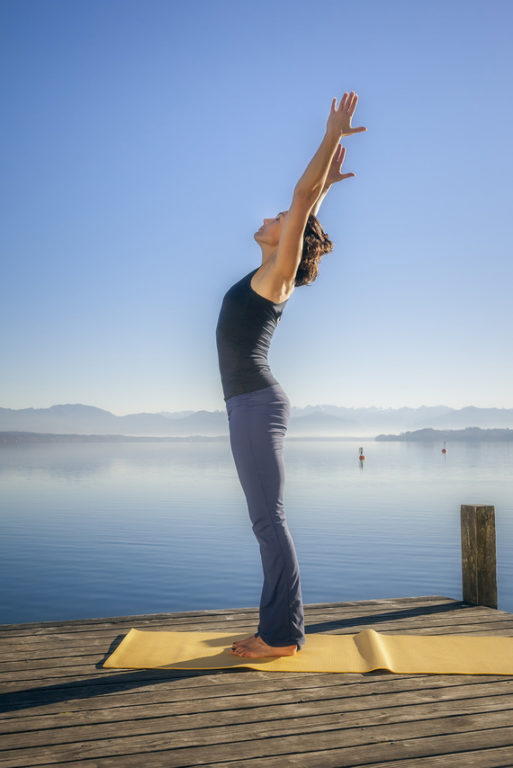
Tadasana is extremely beneficial. It makes the whole body flexible and prevents it from being tight and hard.
It is such a yoga that creates not only the muscles but the subtle muscles too flexibile.
And in this way, the body plays a big role in mind relaxation and relaxation of joints.
This yoga practice does not only make you fit but also gives your body grace and beauty.
In the body where the excess fat is frozen, it melts and brings new accumulation in your personality. Along with the benefits it has some precautions too.
How to do tadasana
Tadasana is very easy to practice. To get the most out of this, you have to do it rightly.
- Firstly, you stand up and keep your waist and neck straight.
- Now lift your hands over the head and slowly take the whole body up while breathing in.
- Feel the stretch from the toe to the fingers of the hand.
- Keep this state for some time and breathe normally.
- Then gradually bring your hands and body back to the normal.
- In this way a cycle is completed
- Practice it at least three to four times.
Benefits of Tadasana Yoga
Tadasana helps to lose weight: If this posture is practised properly, it can be helpful to reduce stomach fat to a great extent.
Not only the fat of the stomach, but it can also play a bigger role in reducing the excess fat of the whole body. By doing this asana properly, the entire body gets stretched and which helps in getting body-toned.
Increase Height: This asana is the best yoga practice to increase the children’s height.
In order to increase the height, children of 6 to 20 years of age are given this asana. If you do this in front of a yoga specialist, then the probability of the result is greatly increased.
Tadasana for back-pain: This asana is very beneficial for back pain. If practised in the right way, then you can get rid of back pain forever.
In it, you pull yourself upward and try to feel the strain wherever there is pain.
Tadanasa for nerves and muscular pain: If you are troubled by nerves, it does not only reduce the pain of the nerves but strengthens the nerves with the muscles. Helps in removing muscle cramps and turbulence.
Relief of knee pain: If you are troubled with knee pain, then you should practice this yoga posture. But keep in mind that you have to keep your soles on the floor and do not do this posture while coming to the toes.
Teaches the art of walking: Very few people do not know how to walk. Especially, this particular focus is found in the contribution of Dr. B K Ayengar.
Practising this easy asana perfects your walking style and at the same time, gets rid of many problems.
Tadasana for concentration and balance: By doing this yoga properly, your concentration is increased. Regular practice of this can be seen as a good effect of balance in the body.
Tadasana strengthens the legs: Tadasana is very beneficial for the problems of feet like swelling, pain, numbness, irritation and tingling.
Tadasana For Pain And Suffering: By practising it, the pain and suffering of the whole body can be reduced.
Tadasana’s Precautions:
1. Tadasana should not be done by the one’s who has a lot of pain in his knee.
2. It should not be practised when you have a headache.
3. If you are learning to do this posture then do not try to do this yoga on your feet.
4. Even if the blood pressure is high or low, this should be avoided.
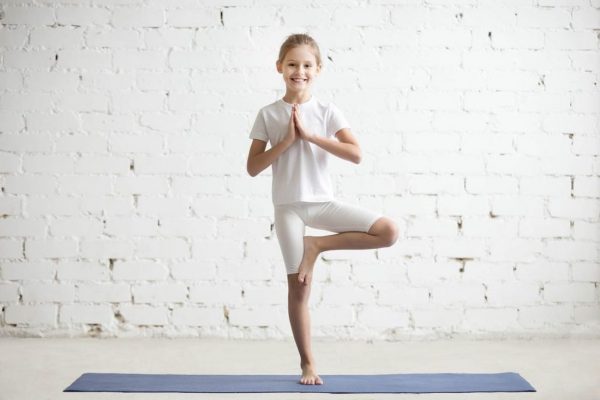
2. Vrikshasana | Tree Pose
This posture shows the calm and steady-state of the tree. In contrast to other Yogasanas, in this posture, we have to keep our eyes open for maintaining the balance of our body.
Vrikshasana simple yet effective yoga pose for stress relief.
How to do Vrikshasana
- Stand straight by keeping hands together.
2. Folding right knee, place your right paw on the left thigh. Your right foot is tied at sole of left thigh.
3. Keep balance while keeping the left leg straight.
4. After making good balance, take a deep breath inside, take your hands on the head with gratitude, and make the melody of Namaskar.
5. Look at the front, a straight look is very helpful in making the right balance.
The spinal cord is straight. Your body is stabilized like a rubber band. Each time you breathe out, leave your body loose and relax, keep smiling, and breathe.
6. Slowly bring your hands down while breathing. Slowly straighten the right foot.
7. Just before standing as long as possible, now repeat the asana by placing the left soles on the right thigh.
Benefits of Vrikshasana
After doing this asana you feel full of energy. This asana produces a strain in the muscles of the legs, arms and gives you freshness.
One of the best yoga poses for stress relief is vrikshasana.
It brings stability and balance in the brain.
Help in increasing concentration.
This asana strengthens the legs and helps in balancing. I also help in the spread of the joints.
Very helpful in the pain of nerves.
Precautions:
If you are suffering from migraine, insomnia, low blood pressure or high blood pressure, then do not do this asana.
3. Suryanamaskar
In India, the Sun is considered a symbol of knowledge and energy. The order of worshiping the sun daily is been continued here from ages.
‘Surya-namaskar’ is done in Yoga for getting knowledge and energy from Sun God.
Surya-namaskar is a complete spiritual practise in itself, which includes asana, pranayama, mantra and meditation system.
Surya namaskar is a simple and complete exercise, whose multitudes and multi-dimensional make our life radiant, healthy and dynamic.
Read full in detail: Surya Namaskar
Pranamasana (प्रणामासन): Stand straight on the feet and keep the feet together. Close the eyes and mix the two hands of the other hand with the thorax (cinephor) in the middle. Hold the pose of Namaskar.
This posture increases concentration and benefits of mental peace.
Surymanskar Steps :
A total of 12 postures are performed in Surymanskar.
The 12 physiological stays in this regard are also claimed to be related to 12 zodiac signs.
The most auspicious time to perform surya-namaskara/sun salutation is during the sunrise.
If possible, it is more beneficial when you do it in a clean airy place facing the sun. This can be done even during sunset.
If you do not get time, it can be done at any time during the day but your stomach should be empty.
The order of performing the surya namaskar is as follows:
Handover Pose (हस्तउतानासन): Now lift both hands on the elbow and lift it above the head.
Keep both hands on the distance of the width of your shoulders. Now hand, head and body bend backwards.
This posture affects the digestive system. Hand, shoulders and spinal cord is strengthened while doing this pose.
Extremely beneficial in weight loss.
( Also read: 6 powerful yoga poses for weight loss )
Foothills Pose (पादहस्तासन):
Now slowly gravitate toward the front. Keep both hands in front of the feet and touch the ground.
Try to kneel the forehead with knee. Keep in mind that your knee should be straightforward.
It reduces excess fat on the stomach, removes constipation, makes the spinal flexibility, and strengthens the digestive system.
Horse riding Pose (अश्वसंचालनासन):
Now bow down to the lower side and keep the palms facing both legs.
Breathing in start bending downwards and push your left leg as back as possible and look up towards sky, while the palms are in touch with the floor beside the chest. The right leg will be in the middle of both the hands.
Maintain the body balance equally. Turn the head backwards and upwards and make the back curve.
This posture strengthens the nerves of the feet. The nervous system is balanced. Due to this it is considered as one of the best yoga poses for stress relief.
Mount Pose पर्वतासन:
Now ley the left foot and join the right leg. Raise the hips above and above.
Keep the head between the two hands in front.
Hands are straight. Your chest must face downwards to form an inverted V. This asana strengthens the hand and foot muscles and spinal cord.
Ashtanga Namaskar (अष्टांग नमस्कार):
Now slowly bow down lower and touch the ground with both legs finger, both knees, both palms, chest and chin, with eight limbs.
This posture strengthens the hands and feet and the nerves of the nervous system.
Cobra Pose (भुजंगासन):
Now bring the hip to the lower side. Straighten the hands with the right oars and make head and back look like the back.
Look at the sky. In this posture, the body is like a snake and hence it is called Bhujangasana.
With this posture the spinal cord is flexible. Very beneficial for reproductive organs and digestive system.
Mount Pose पर्वतासन: Now again the head and back should be erected and repeat the verb (point 5).
Horseback riding: अश्वसंचालानासन : Now the left leg is to be done by Horsechalnasanasan (point 4) by keeping both hands together.
Padahastasan प्रणामासन: Now it is to put both hands in the side of the foot and do the padahastasan (point 3).
Handset Replacement पादहस्तासन: Now the two hands, head and body should be recaptured to the handout (point 2).
Pranamasana (प्रणामासन):
Putting the hands of both hands on the thorax (point 1) is to be done.
In this way, the half-cycle of Suryanmask is complete.
In the exercise of the full cycle, in lieu of the right leg in posture 4 and 9, the left leg is to be withdrawn and the right foot is kept in place.
Benefits of Suryanamaskar
Suryanmaskar consists of simple and versatile yoga poses for stress relief and anxiety.
The information about the various benefits of surya namaskara are given below:
• Only one Suryanamaskar gets the benefit of doing 12 postures.
• Doing during the sunrise in the morning on empty stomach, the bones also get vitamin D from the sun’s rays, making the bones strong.
• Suryanamaskar is the perfect yoga for relaxing body, internal massage of joint and nerves.
• The whole body becomes flexible.
• Helps in losing weight.
• Helps in hair loss and whitening of hairs..
• All the systems of the body such as digestion, respiration, reproduction, nerve and endocrine glands are balanced.
• Provides blood flow to the brain.
• Suryanamaskar is useful for reducing belly if done for 40 days.
• Provides mental peace and patience.
Precautions
• Person’s suffering from uncontrolled hypertension, hernia, severe heart disease, dizziness and serious condition of the spinal cord should not do Surya-namaskar.
Repetition leads to fast results, so doing these yoga poses for stress relief repeatedely will give you fast results.
4. Gaumukhasana
In Sanskrit, ‘gau’ means ‘cow’ or cow’s face.
This is called “Cow Face Pose” in English. It is extremely beneficial posture for women.
This posture is very beneficial for arthritis, cystic, indigestion, constipation, metastasis, diabetes, pain in the waist.
How to do Gaumukhasana
The way to do Gomukshana Yoga is very simple.
By understanding the method given below, you can practice this posture with very simplicity.
First of all, you sit in front of both feet and keep the arm next to it.
Bend the left leg to the knee and place it on the ground beside the right buttocks.
In the same way, fold the right foot with knee, bring it from the left foot and keep the right heel near the left buttocks.
Now you lift the left hand and turn it from the elbow and take it down from the shoulders towards the back.
Take the right arm, turn from the elbow and take it backwards and take it back on the back.
Keep the fingers of both hands behind the back in such a way that interconnect each other.
Now try to push the head to the elbow and push it back as far as possible.
Try to look forward as far as possible and hold the posture accordingly.
It’s half a circle.
Repeat this by changing the positions of the feet and hands.
Now one cycle is completed, this way you do three to five times.
Benefits of Gomukhasana:
By the way, Gomukshasan has many benefits. Here are some of the important benefits.
Gomukhasana for Asthma: It is a very useful Yoga for lungs and helps in respiratory diseases.
It reinforces the chest and increases its ability while cleaning the lungs. Therefore patients suffering from asthma should practice this posture regularly.
For the strengthening of the cow’s arms: If you have to strengthen muscles of the back and arms, then you must practice this asana.
For the health of the hips: If you are troubled by the pain of hips, then practice this asana.
It also strengthens the spine along with keeping it straight.
Preventing Hemorrhoids: It is considered to be very useful yoga for hemorrhoids.
Gaumukhasana for cervical spondylitis: With the practice of this asana you can get rid of many problems like shoulder stiffness, neck pain, and cervical spondylitis.
Gaumukhasan for Sexual Problems: This posture is very effective in removing sexual problems. It is also very beneficial for gynecological diseases.
In the back pain: With its regular practice, you can get relief from the problems of back pain.
Gaumukhasana for the liver and kidney: It plays an important role in keeping your liver and kidney healthy.
To make the body shiny: By doing this asana, the body becomes smooth and flexible.
Gaumukhasana for Diabetes: It stimulates your pancreas and is helpful in controlling diabetes.
Cautious care
If you are bleeding with your hemorrhoids, you should not practice this asana.
Do not practice this posture when there is excessive pain in the hands and feet.
If there is a serious problem in the spinal cord, do not do this yoga at all.
Do not force the force behind the back if you are having trouble getting your hands behind the back.
Do not practice it when there is pain in the knees.
Regular practice of these yoga poses for stress relief will give you immense benefits.
5. Vakrasana
Ayurveda makes the body healthy. In the same way, Yoga keeps you healthy in both from the inside and outside.
Vakrasana is the pose of yoga that is done by sitting. And the sense of curvaceous means curved. The neck is straight in this and the body remains crooked.
How to do Vakrasana Step by Steps
• First of all, place a posture.
• Sit and spread your legs
• Keep the waist straight and keep the eyes facing the front.
• Keep both hands right next to you.
• Bend the right knee.
• Then move the right hand behind the back.
• Stay in this situation for a while.
• Turn the knee of the left foot and make this seat.
• Keep the left hand on the right knee and keep it in the ground.
• Lightly move the neck backwards and try to see the maximum rear.
Advantages or Benefits of vakrasana
Doing this posture gives you many benefits.
• This yoga pose helps your body get rid of diseases in kidney, liver and stomach cancer.
• Body cramps and neck problems are fine.
6. Bhujangasan Yoga
It is called ‘Bhujangasan’ due to the form of the body being similar to a snake while keeping it in Asana.
In English it is also called Cobra pose. This Asana is done in serial number 7 while doing Suryanmaskar. This is the most beneficial posture for people suffering from back pain.
More information about Bhujangasan is given below:
How to do Bhujangasan step by step
• Make a seat in a clean and uniform place by having a mat
• First lie down on the stomach.
• Keep feet straight.
• Put your palms on the lower floor of the shoulder
• Keep the forehead attached to the ground.
• Now slowly raise the head and the shoulders above the ground. When lifting the head up, breathe in.
• Do not let more pressure on hands.
• Now gradually straighten the hands move your back backwards. Keep the navel placed on the ground. In this condition, breathing is normal. Stays for 20 to 30 seconds in this condition and extend the intervals with practice.
• After a brief stay in this final position, slowly come down and relax in the earlier situation. This action is to be done with exhalation.
Bhujangasan’s benefits:
The spinal cord becomes flexible.
This posture is beneficial for people suffering from throat or asthma.
Back bones are strengthened.
Benefits in gastro-like diseases such as liver and kidney disease.
Complications of constipation are far away.
Relieving fat deposited on the stomach and helping to remove obesity.
Women get benefits in reproduction and monthly related problems.
Precaution in Bhujangasan
The following caution is done in Bhujangasan:
Persons suffering from hernia and hyperthyroidism should not do this posture.
Do not posture this when there is excessive stomachache.
Backwards should not be bowled accidentally head and back.
Make this seat according to your ability.
With this posture you can make your body flexible and nimble.
If you already have any disease or problem, you should consult your doctor and yoga specialist while doing any new exercise or asana.
Till now we have covered 6 best yoga poses for stress relief.
7. Shavasana
In today’s era, people suffer from physical, mental exhaustion and stress.
Shavasana is the best yoga posture to relieve body stress and relax the mind.
In this posture, we have to lie down like a dead body and that is why it has been given such name.
In English, it is called Corpse Pose.
More details on the method of breathing, benefits and caution are given below:
• First of all lay a gap or mat on a clean and flat place.
• Now lie down on the back.
• Keep both hands on a distance of 6 inches from the body.
• Keep palms open to the sky.
• Keep both legs one foot away from each other.
• Now gradually relax the whole body. All limbs are loosened, respectively, from the bottom to the attention of each part of the body.
• Turn your mouth and eyes off.
• Slowly do breathless breathing. All attention should be kept on breathing and there is no other thought in mind.
• As long as the diet starts sleeping while breathing, breathing long and deep.
How to do Shavasasana Step by step
Benefits of Shavasana
Mental and physical stress is removed.
Useful in diseases like diabetes, hypertension, depression, heart failure, psychosis, insomnia etc.
Increase concentration, memory and thinking system
Self-confidence increases by regular shavasana practice.
Increases brain efficiency.
Caution :
There is no harm in shavasana, but if the doctor has forbidden you to lie on the back for some reason, then this should not be done.
Shavasana is the easiest yoga in this posture but it is the most difficult to do. Due to the maximum benefit of being burnt, it must be done. After doing any yoga or physical / mental exercise, it must be done.
8. Anulom Vilom
There are two main things that cause this companion – sky and prana. Both are everywhere.
Oxygen is the internal energy that is in the gross of organisms. This life force which includes the mind too, we get it through the breath.
The same prana shakti is transmitted throughout the body through the nerves.
Breathing is the gross form of air and life is the subtle form of life. The name of exhaling outer air and leaving it out is breathing – action.
In the body, the respiratory action keeps moving from birth to death. Regulation of this respiratory action is called pranayama.
The definition of pranayama in the Patanjali yoga sutras is given in such a way,
That is, the separation of movement of breath and breathlessness is called pranayama.
Today, we will know about the basis of Pranayama in the context of Anulom Vilom Pranayam.
This is to make new seekers capable and capable of pranayama. The beginnings of learning pranayama are done from this.
Then again other types of practice are done. Long-time Kumbhak, Kapalbhati, Bhastra, etc. are done after learning anulom vilom.
Anulom vilom pranayam is also known as Nirdhodhak Pranayam. In English it is also known as Alternate Nostril Breathing.
The method of breathing in and out is done repeatedly. If it is done every day, then all the nadis will become healthy and strong. This pranayama can be done by a person of every age.
How to do Anulom Vilom Pranayam step by step
• First of all, by putting a yoga mat or blanket on a clean place, sit in Sudhasan, Vajrasana or Padmasana.
• Keep eyes closed.
• Keep the left hand on the knee.
• Take out the first breath and make a nasal posture.
• Close the right nose of the nostrils with the right thumb.
• Both fingers near the thumb and keep the middle finger in the embryo.
• Now breathing through the left hole, after this, close the left pore with the ring finger and exhale by removing the thumb from the right hole.
• Now start this process from the left punch.
• 2.5 seconds in breathing and 2.5 seconds for breathing, such a breath and leave process are of 5 seconds.
• In this way, it starts with such a recurrence, starting at least 5 times, gradually increasing.
• Finally, put the right palm on the knees and breathe 5 breaths out of both the nostrils.
• 7 to 10 minutes per day Take up to 15 minutes in normal condition and 30 minutes for incurable diseases.
• We can do this in 2 ways. The first method is to breathe in and to stop breathing is not to stop.
The time for breathing and leave should be the same.
Count in your mind In the second method, it can do with an intermediate, meaning breathing in equanimity and preventing breath, then breathing in double proportion.
Benefits of Anulom Vilom Pranayama
Anulom vilom pranayam purifies 72000 nadis and hence it is also called nadi-shuddhi pranayama.
This pranayam gives strength to the heart and cholesterol is controlled.
Whenever we breathe in pranayam, pure air expels the contaminated substances of our blood, through which pure blood nourishes all the parts of the body.
Relieves treatment of arthritis, joint pain, swelling etc. by removing vata, bile, phlegm.
Its regular practice increases the viscosity of the eye.
Helps in correcting Blood pressure.
Beneficial in insomnia.
Help in reducing tension.
It is a special benefit for people suffering from migraine, high blood pressure, low blood pressure, stress, anger, less memory.
This pranayama brings balance in both the hemispheres of the brain as well as co-ordination in thought and emotions.
Precautions in Anulom Vilom Pranayam
There should be no sound in the process of breathing and exhalation.
In the weak and unhygienic person, this posture can be difficult, so be careful.
Anulom vilom pranayama seems very normal to look and do, but when you start practising it regularly, you feel the feeling of the divine from this simple pranayama.
So these were the best yoga poses for stress relief one must do regularly to be benefited by them.
This Indian soothing music will help you get rid of stress in an easier way you didn’t know possible.
Yoga Nidra For Stress Relief

Relaxing Music for Stress Relief